Adding and Coaching Clients
Throughout our documentation, you will come across many references to the term client. This article goes over what the term means within Goalify Professional, how you can invite new clients and how to manage your members list.
Understanding Clients
Within Goalify Professional, we use client as a general term for an actual client, a patient or an employee - really anyone who has accepted a coaching invitation.
As a coach, you can assign and manage goals for a client, analyze a client's progress and keep in touch via the integrated chat feature. You gain access to goals that you have created for your client and to goals that are shared with you by your client. A client can choose to create private goals, which are not shared with you.
As part of every pricing plan, a client will gain access to the Goalify Unlimited Edition for as long as they remain your clients. Additionally, with our generous limits on the number of clients you can coach, you won't have to worry about the cost of adding a new client to Goalify Professional.
Ownership of Data
As a coach, you will be able to manage goals for your clients. When you remove a client from your members list, you and your client will lose access to a client's data.
Use the archive client option to remove access for a client but to retain access to historic data for coaches.
The Goalify mobile app is the ideal way for your clients to view their goals, record and analyze their progress and to connect with you. To get started with the Goalify mobile app, please read the following help documents:
- Within the Goalify app: Open the menu and switch to help.
- Online: Read our full documentation at https://docs.goalifyapp.com/.
- Video channel: Watch our many 30-second how-to videos at Goalify User Edition
Inviting a new Client
Quick Setup Tutorial
- Go to your team's Members menu
- Choose the Add Member option using the Action button
- Enter your client's details
To invite a new client, switch to the Member list of your team. From the main Action button select the Add Member option. This will open the invitation widget so you can add some information about your client. While only a first name and e-mai address are required, we recommend that you also enter a last name for your client. This will make it easier to tell your clients apart in your members list.
You can add additional fields from the Add field button to enter contact and personal information if needed. When you're done entering your client's details, create the invitation using the Save button.
Goalify Professional will offer you the option to send an invitation e-mail on your behalf. Only use this option, if you have obtained the necessary consent of the recipient to receive communications from you.
If your client is already registered with the same e-mail address, we will also send a push notification to his or her mobile device.
Accepting an Invitation
Ask clients to sign into Goalify using the e-mail address you used when adding them as client members. Our invitation e-mails include easy to follow step-by-step instructions to guide clients through onboarding.
Batch Inviting New Clients
Quick Setup Tutorial
- Go to your team's Members menu
- Choose the Import Members option using the Action button
- Enter your clients' details
In case you want to invite many clients at the same time, it is much faster to use our batch import option. Using this feature you can either upload a list of your clients or paste a list directly into the browser.
To batch invite new clients, switch to the Member list of your team. From the main Action button select the Import Members option. This will open the import screen. You can either choose to upload an existing list as a text or .csv file or past the information into the designated text field.
Your data must have the following structure:
- e-mail address,
- first name,
- last name (optional)
The following delimiters are applicable: colon, semi-colon or tab. Use our auto-detect feature if you are not sure or when pasting data from spreadsheet software like Excel or Numbers. You need to provide some input for all three columns, however you can choose to not enter a last name.
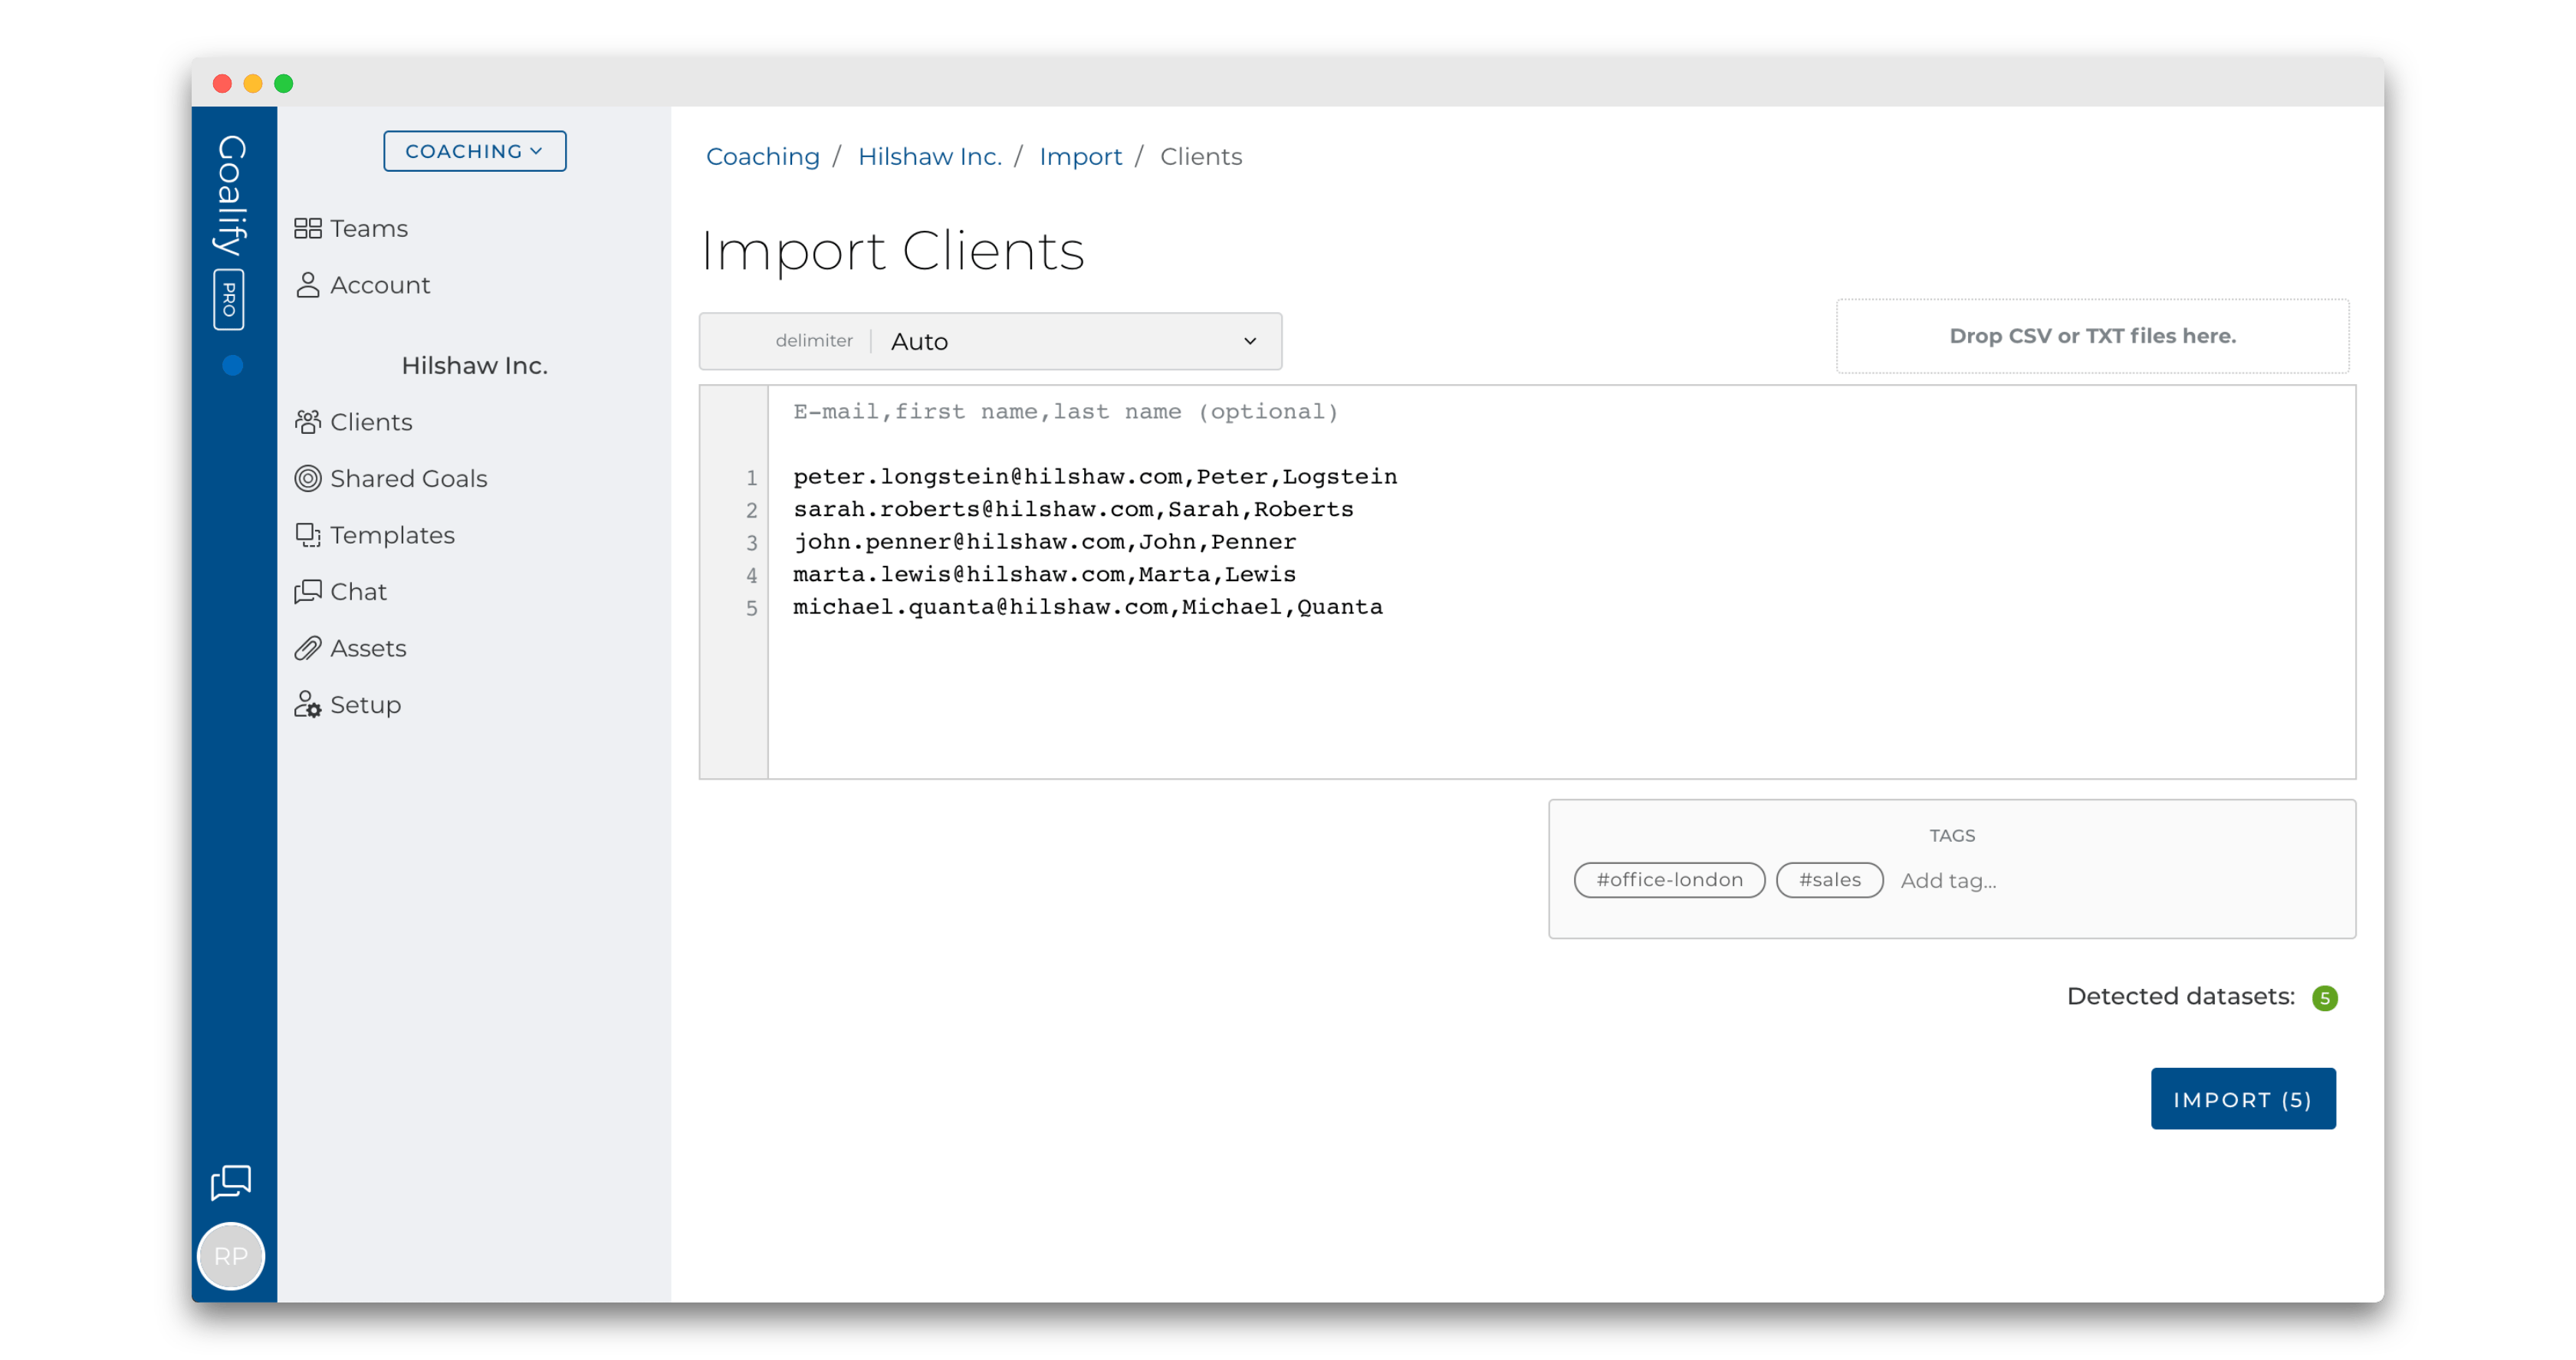
Data rows that return an error will be marked in red. We will also display a warning below the data.
You can make adjustments to the data to be imported. When you are ready, click the Import button below the shown data. This button will also tell you how many invitations will be created.
Open Invitations For Clients
Quick Setup Tutorial
- Go to your team's Setup menu
- Choose the Add Open Client Invite option from the Action button
- Use the QR code or invitation link
Open client invitations let you quickly sign up many clients without creating individual invitations, as an unlimited number of people can use the same open client invitation. This can help you offer a coaching invitation to a group of potential clients without collecting their e-mail addresses first.
To create an open client invitation, switch to the Setup menu of your team. With the main Action button, select the Add Open Client Invite option. You can use the created QR code or invitation link in presentations, newsletters and more.
Clients accepting the invitation are automatically added to your members list.
Open Invitation & Tags
You can add tags to an open invitation. These tags will be added to every client accepting the particular invitation. This can be helpful when administrating and grouping clients later on.
Adding a Goal to a New Client
Quick Setup Tutorial
- Go to your team's Members menu
- Select your client
- Choose the Add Goal option using the Action button
- Define the goal
After you created a client's invitation, you can start adding goals to his/her dashboard. Please read our full documentation on Understanding Goalify Goals to familiarize yourself with the different options you have. You will find additional help in our Managing Goals for a Client support guide.
Using Reminder
Quick Setup Tutorial
- Go to your team's Members menu
- Select your client
- Choose the Add Reminder option using the Action button
- Define the reminder
Reminders are push notifications that you can send to a client according to a predefined schedule. Reminders can be useful in many different situations:
- Remind a client of a task
- Send positive reinforcements
- Remind clients of a regular event
Shared Reminder
Use shared reminders whenever you need to assign the same reminder to several clients.
Add a new Reminder
To create a new reminder for one of your clients, switch to the members list of your team. Select the client you wish to create the reminder for. With the main Action button, select the Add Reminder option.
This will open the create reminder window. In addition to the name of a reminder, a reminder has a few more properties that can be modified:
- Name
Name of the reminder.
- Notification
The actual message that is sent with each notification to a client.
- Time
Time entries define at what time and interval a reminder should be sent to the client. A reminder can have as many timing entries as needed.
You need to set a name, a notification text and at least one notification to create a new reminder. To add a notification to the schedule of a reminder use the Add button within the notifications section.
Notifications are defined by
- Type
You can choose between daily, on certain weekdays or certain days of the month.
- Style
You can choose to send the reminder at a certain time on a specific day or according to a schedule (i.e. every 60 minutes between 9am and 5pm). Choose the Time Span option to set an interval.
Click the Add button to add the notifications to the notification list of the reminder. Once you have set up all your notifications of the reminder you can save and activate the reminder by clicking the Save button on the top right.
Editing a Reminder
Click on a reminder to edit its name, message and notification schedule.
Pausing a Reminder
Click on the activation toggle of a reminder to choose between active and paused. You can pause and unpause a reminder at any time.
Deleting a Reminder
Click on a reminder and choose the Delete Reminder option from the actions button.
Using Shared Reminder
Quick Setup Tutorial
- Go to your team's Reminder menu
- Choose the Add Reminder option using the Action button
- Define the reminder
- Add clients to the reminder
Shared Reminders work just like reminders created for one specific client, but with the ability to add several clients to the recipient list.
After you have set up your reminder, add clients by using the Add button within the clients' section. Use the Edit button to remove clients from the recipient list of the reminder.
Shared reminders are managed from the team's Reminder menu. However, each recipient will also show the shared reminder within his/her reminder section, where individual and shared reminders are organized in two separate lists.
Organizing Clients with Tags
Depending on the way you use Goalify Professional for your professional coaching needs, your members list can grow and become quite long. To keep your list manageable and organized, we have introduced the tag feature. By using tags you can make your members list easier to use.
Here are some examples of how to use tags to structure your members list:
- By coaching agreement
- By location
- By corporate mandate
- Any other grouping system that meets your needs
You can even add multiple tags to every client. Since you can search using tags in almost every search field we provide, tags are a real productivity booster.
Teams vs. Tags
Tags are a powerful feature used to organize a team's members list when using the search bar. You cannot provide access to clients for different coaches by using tags. If you need separate, independent members lists with different coaches accessing different members lists, please familiarize yourself with our team feature.
Adding a Tag
Quick Setup Tutorial
- Go to your team's Members menu
- Click the tag button above the members list
- Enter the name of the tag in the tag bar
- Hit the Enter key
Applying Tags to a Client
Quick Setup Tutorial
- Go to your team's Members menu
- Click the tag button above the members list
- Open the Tags section
- Drag and drop the tag onto the name of the client
Applying Tags to Multiple Clients
Quick Setup Tutorial
- Go to your team's Members menu
- Click the tag button above the members list
- Select the clients you want to apply the tag to
- Click the Add Tag To Selection button
Using Tags in Search
Quick Setup Tutorial
- Enter # directly followed by the tag's name in the search bar.
Removing a Tag from a Client
Quick Setup Tutorial
- Go to your team's Members menu
- Click the tag button above the members list
- Select the client you want to remove a tag from
- Click the red Remove Tag From Selection button
Removing a Tag
Quick Setup Tutorial
- Go to your team's Members menu
- Click the tag button above the members list
- Click on the tag
- Click the remove all tag instances button on the bottom of the tag bar
Communicating with a Client
We believe that communication is crucial for every coaching process. This is why we thoroughly integrated our chat feature into Goalify Professional.
Using the Goalify Professional chat feature, you can do the following:
- Engage in private chat conversations
- Engage in group chat conversations
You can learn all about our chat feature by reading our private chat and group chat guide.
Archiving a Client
This action CANNOT be undone!
Archiving a client from your members list is a one-time action and it CANNOT be undone. Please be extremely careful when archiving clients from your team's members list.
Quick Setup Tutorial
- Go to your team's Members menu
- Select your client
- Choose the Archive client option using the Action button
Once you archive a client, a few things will happen:
- Coaches will keep access to all historic data connected to goals, workflows and reminders of this client
- The client will lose access to all goals, workflows, reminders and connected data and will be removed from the team
- Your client will be removed from your shared goals and public challenges - shared goals goals will be retained as individual goals on the archived client's dashboard.
Removing a Client
This action CANNOT be undone!
Removing a client from your members list is a one-time action and it CANNOT be undone. Please be extremely careful when deleting clients from your team's members list.
Quick Setup Tutorial
- Go to your team's Members menu
- Select the More button on the top of the members list
- Choose the Delete Clients option
- Select the clients you want to remove
- Confirm your selection and click the red Delete Clients button.
Once you delete a client from your members list, a few things will happen:
- You will lose access to all goals and connected data for that client
- You can decide whether or not your client should be able to retain access to his or her goals, i.e. the ones you created
- Your client will be removed from your shared goals and public challenges