Designing Workflows
Designing Goalify workflows is made easy and intuitive, thanks to our visual design approach. You can use the workflow layout designer to draw and structure your workflows and processes, and then implement that same design with the push of a button. No longer will you need separate tools for visualizing, implementing, and reviewing processes. You can learn more about this great feature below.
To design or adjust a specific workflow, switch to your team's Workflows menu. Click on the name of the workflow to open its dashboard. From the dashboard, you can click the Edit Layout button to launch the layout designer, which is where you can make the necessary adjustments, such as adding new steps, changing the order of steps, or modifying the properties of existing steps.
Use the workflow designer to:
- Design the workflow visually
- Adjust the settings of the particular workflow version
- Simulate your members' experiences when working on this workflow

Adding Steps
A workflow design consists of any number of steps. If necessary, steps can be arranged in a specific order in which they need to be completed.
Quick Setup Tutorial
- Go to your team's Workflows menu
- Open the workflow dashboard
- Open the layout designer
- From the toolbar open theAdd Element menu.
- Drag & drop steps onto the canvas
When designing your workflow, you have different types of step elements that help you model your workflow. You add steps to a workflow by simply dragging them from the toolbar'sAdd Element menu onto the canvas.
Add Step Description
Quick Setup Tutorial
- Click on the name of the step to open the settings window
- Click the Add Description button
- Add and format the step's description
- Confirm your entry with the Done button
- Click the Update & Close button to apply changes
Use the description field of a step to help your clients understand the purpose or outcome of the step. If you require additional information or want to attach a PDF document or video, consider using the document feature.
Attaching Documents
Goalify Professional's document feature is also available for workflow steps. This allows you to add a wealth of additional information to each step: documents, pictures, videos, forms or even dynamic web content.
Quick Setup Tutorial
- Click on the name of the step
- Click the Add Document button
- Attach up to 10 documents
To attach a file or document to a step, open the settings window by clicking on the name of a step. Next, click on the Add Document button to add up to 10 files or documents to this step. Learn more about managing documents by reading our documents guide.
Timing Steps
By default, steps in a Goalify workflow do not have time constraints. However, you can add a start time and a duration to a step to further organize your workflow.
Adding timing to a step will allow you to do the following:
- Only allow the step to become available at a specific time, day of the week, or month
- Specify the maximum amount of time available for completing the step, after which it will be marked as overdue.
Start Time
Quick Setup Tutorial
- Click on the name of the step to open the settings window
- Click the Add Behavior button
- Open the Step Start tab
- Choose and adjust your preferred timing option
- Click the Update & Close button to apply changes
You can set a specific time of the day for a step to become available. There are different options to set the start time:
- Pin
You can specify a specific time or date and time for the start of a step.
- Start on Selected Days
You can use this setting to ensure that the step is only accessible on specific days of the week. This is especially helpful in a business environment when you want to prevent the step from being available on weekends.
The start time is different for initial steps (steps without a prior step) and those that follow after another step.
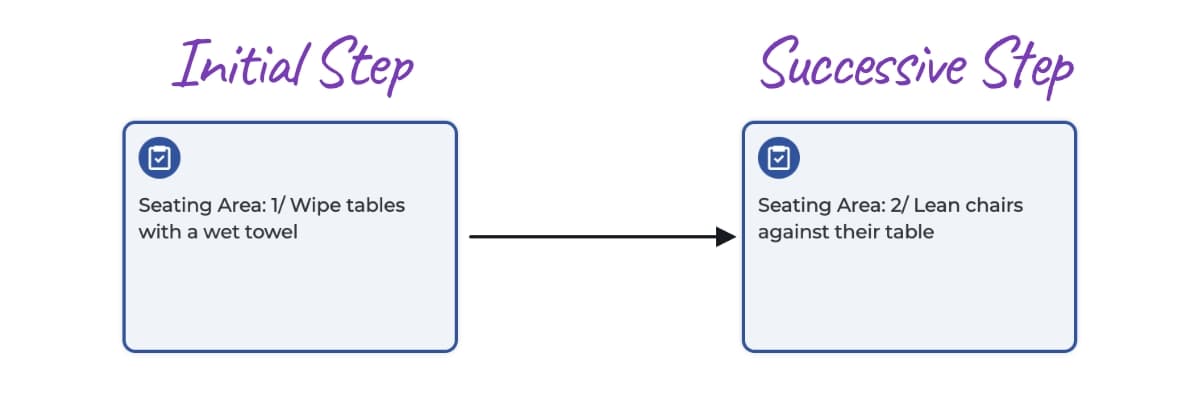
Initial Step
If a workflow starts after the specified start time of an initial step, meaning it has no prior steps, the step becomes available immediately. The start time refers to the actual time specified for the step, not the start time of the workflow. As a result, a step with a duration might already be marked as overdue, meaning it has passed its due time, when it becomes available.
Successive Step
If a successive step has a start time earlier than the completion time of the previous step, then the successive step will be available the next day at the specified time.
This also occurs when the previous step's start time and duration settings exceed the subsequent step's start time.
About Goalify's timing
When a step is set to start before the prior step is completed or is set to end, Goalify will always push that step's start to the next opportunity when that time becomes available.
However, if a step is completed late, causing the successive step to miss its start time, the start time of the next step will not be pushed in the future.
Duration / End time
Quick Setup Tutorial
- Click on the name of the step to open the settings window
- Click the Add Behavior button
- Open the Step End tab
- Choose and adjust your preferred timing option
- Click the Update & Close button to apply changes
You can set a time limit for a step using the duration setting. If the step is not completed within that time, it will be marked as overdue. Even if a step is overdue, a client can still access it and mark it as completed. However, it will be noted as late completion.
There are different options to set a duration:
- Duration
You can set a time in seconds, minutes, or hours. Next steps will only become available after the specified time, even if they are finished early. If a client goes over the set time and doesn't mark the step as completed, the step becomes overdue.
- End of Day
Day of Week
Day of Month With these duration settings, you have access to more dynamic timing options. They let you specify the end time of a step, such as by the end of the current day. Depending on the step's actual start time, this may give the client 14 hours to work on it (when started at 10 am) or only 4 hours (when started at 8 pm).
You can link a step's duration to a specific weekday or even to a certain day of the month. You can also combine these settings with a specific time of day.
- Pin
You can also specify a specific time or date and time for the end of a step.
Order Steps
Whenever you want to make sure that a certain step only becomes available when a prior step is completed, then you need to draw a connection from the first to the second step. A step can also be dependent on the completion of a number of previous steps.
Quick Setup Tutorial
- Hover your mouse over the first step
- Click & hold the connector icon
- Move your mouse to the adjacent step
- Release the mouse
Remove Step Order
Quick Setup Tutorial
- Hover your mouse over the connecting arrow
- Click the delete button
If you need to remove the connection between two steps, simply hover over the linking arrow and click the delete button.
Adding Data Fields
Quick Setup Tutorial
- Open a step's settings by clicking on its name
- Click the Add Data Field button
- Select the correct type
- Define the data field by adjusting its settings
- You return and apply the data field by clicking the Return button
A data field is used to ask the workflow user to provide specific information when completing a step. It can ask for text, number, file or picture, date, time, geo-location input, or for selecting from a range of choices. The answers given by the workflow user are saved along with the activity data of the corresponding cycle.
Using the data field in subsequent steps
You can utilize the input provided by a client in the subsequent steps of the workflow. The collected data can be used to compare against a branching condition or as a placeholder within all text fields that display the data field icon.
How to use data fields with a branching condition
How to use data fields in text areas
Workflow Variables
You can use variables in Goalify workflows to design a more dynamic experience for your clients. A variable is a placeholder for a value that can change, depending on conditions or on information passed to the workflow. The use of variables can also speed up the time you will need to design your workflow.
You can set the different workflow variables by clicking the button from the workflow's toolbar.
There are three different kinds of variable types you can use:
- Variables
You can use a variable instead of setting the same value for several steps. When you use a variable, you only need to change the value once, and all settings will automatically be updated with the new value.
Example: Imagine you want to schedule several steps to start at 9:30 in the morning. Instead of setting the start time of each step to 9:30 one by one, you can create a variable and set the variable instead of the actual value. If you ever need to change the start time, for example in a new workflow version, you only need to update the value of the variable instead of having to open each step and update the start time manually.
- Roll-out data fields
A roll-out data field is similar to a regular data field that prompts the workflow user to provide information. However, it is completed by the person assigning the workflow during roll-out, rather than by the user of the workflow. You can use the roll-out data field in your workflow design just like you would use a regular data field.
- Server-side strings
You can use server-side strings to securely store credentials for backend services. Unlike regular variables, these strings are not sent to client devices, reducing the risk of exposure to unauthorized users. This makes them ideal for storing credentials needed to authenticate API calls initiated with a Call API element.
Using Branches
Quick Setup Tutorial
- Open a step's settings by clicking on its name
- Click the Add Data Field button
- Select the correct type
- Define the data field by adjusting its settings
- You return and apply the data field by clicking the Return button
Branches are useful when you want to send users down different paths in your workflow. You can use branch logic to direct respondents to different step elements based on variables like question responses or roll-out data fields.
User Change
Keep your workflows moving by transferring responsibility to the right person at the right time.
Use a User Change whenever ownership needs to change—for example between employees, supervisors, departments, or shifts. The new assignee continues exactly where the previous person left off, ensuring work progresses without interruption.
You can define the next assignee when designing the workflow or allow the current user to decide who should continue during workflow execution.
Quick Setup Tutorial
- Add a User Change step to the workflow.
- Choose how the workflow should be transferred.
- Apply your changes.
For each User Change, you can decide whether the transfer should affect only the current branch or the entire workflow.
Use the Impact setting to choose how far the change applies:
- Granular: Only the current branch and all following steps are assigned to the new user.
- Workflow-wide: The new user becomes responsible for the entire workflow from this point onward.
Transfer to specific people
Automatically assign the workflow to one or more specific people.
This is ideal when responsibility should always move to the same person or team.
Quick Setup Tutorial
- Add a User Change step to the workflow.
- In Switch to…, select the person or people who should receive the workflow.
- Apply your changes.
Let the current user decide
Give the current user the flexibility to choose who should continue the workflow.
This is useful when the next responsible person depends on the situation and cannot be determined in advance.
Quick Setup Tutorial
- Add a Choose User data field to an earlier step in the workflow.
- Add a User Change step.
- In Switch to…, select the Choose User data field.
- Apply your changes.
Create Workflow Ticket
Offer the workflow to a group instead of assigning it to a single person.
Eligible members are notified that a workflow is available. The first person who claims the ticket becomes the new assignee and continues the workflow.
You can define eligible members by using tags or by selecting a member role, such as Regular Members or Coaches.
Quick Setup Tutorial
- Add a User Change step to the workflow.
- In Switch to…, select a member tag or choose a user role.
- Apply your changes.
Workflow Timeframe
Quick Setup Tutorial
- From the toolbar click the button
- Click the Add Timing button
- Select your preferred timing options
As for a workflow step, you can set a duration for the entire workflow. If all interactive steps are not completed within the specified time, the workflow will become overdue. You can choose from the same timing options available for workflow steps.
You can also pin the start of a workflow element to a certain date time combination.
You can access the timeframe setting by clicking the button from the workflow's toolbar.
Preview your time settings
If you set any timings for initial steps, than these settings will prevail over the ones that you set for the workflow in general.
We encourage you to use our preview feature to check your workflow's design and to test your settings.
Version Settings
These settings only apply to current version of the workflow. You will find the version settings by clicking the button from the workflow's toolbar.
- Automatic Archival
Turn this setting on if you would like to archive a cycle once its completed or when it becomes overdue.
- Step Succession
This setting allows you to choose how delays in completing a previous step will affect the timing of successive steps.
- View Past Steps
Whether or not clients are allowed view completed steps.
- View Next Steps
Whether or not clients are allowed view a list of all steps that are coming up next.
- View Future Steps
Whether or not clients are allowed view a list of all future steps.
You store all settings by clicking on the Update Settings button on the top right corner.