Working with Workflows
Learn how to create, assign, manage, and improve workflows in Goalify Professional. This guide walks you through the complete workflow lifecycle—from building your first workflow and rolling it out to members to reviewing progress, managing workflow cycles, and keeping your processes up to date.
Creating a New Workflow
Quick Setup Tutorial
- Go to your team's Workflow menu
- Choose the Add Workflow option using the Action button
- Provide a name for the workflow
- Use the workflow layout designer to create the workflow
To create a new workflow, switch to the Workflow menu of your team. With the main Action button, select the Add Workflow option.
Enter a name for your workflow and proceed to the workflow designer by clicking the Edit Layout button. You can learn more about designing and creating a workflow by reading our Designing Workflows Guide.
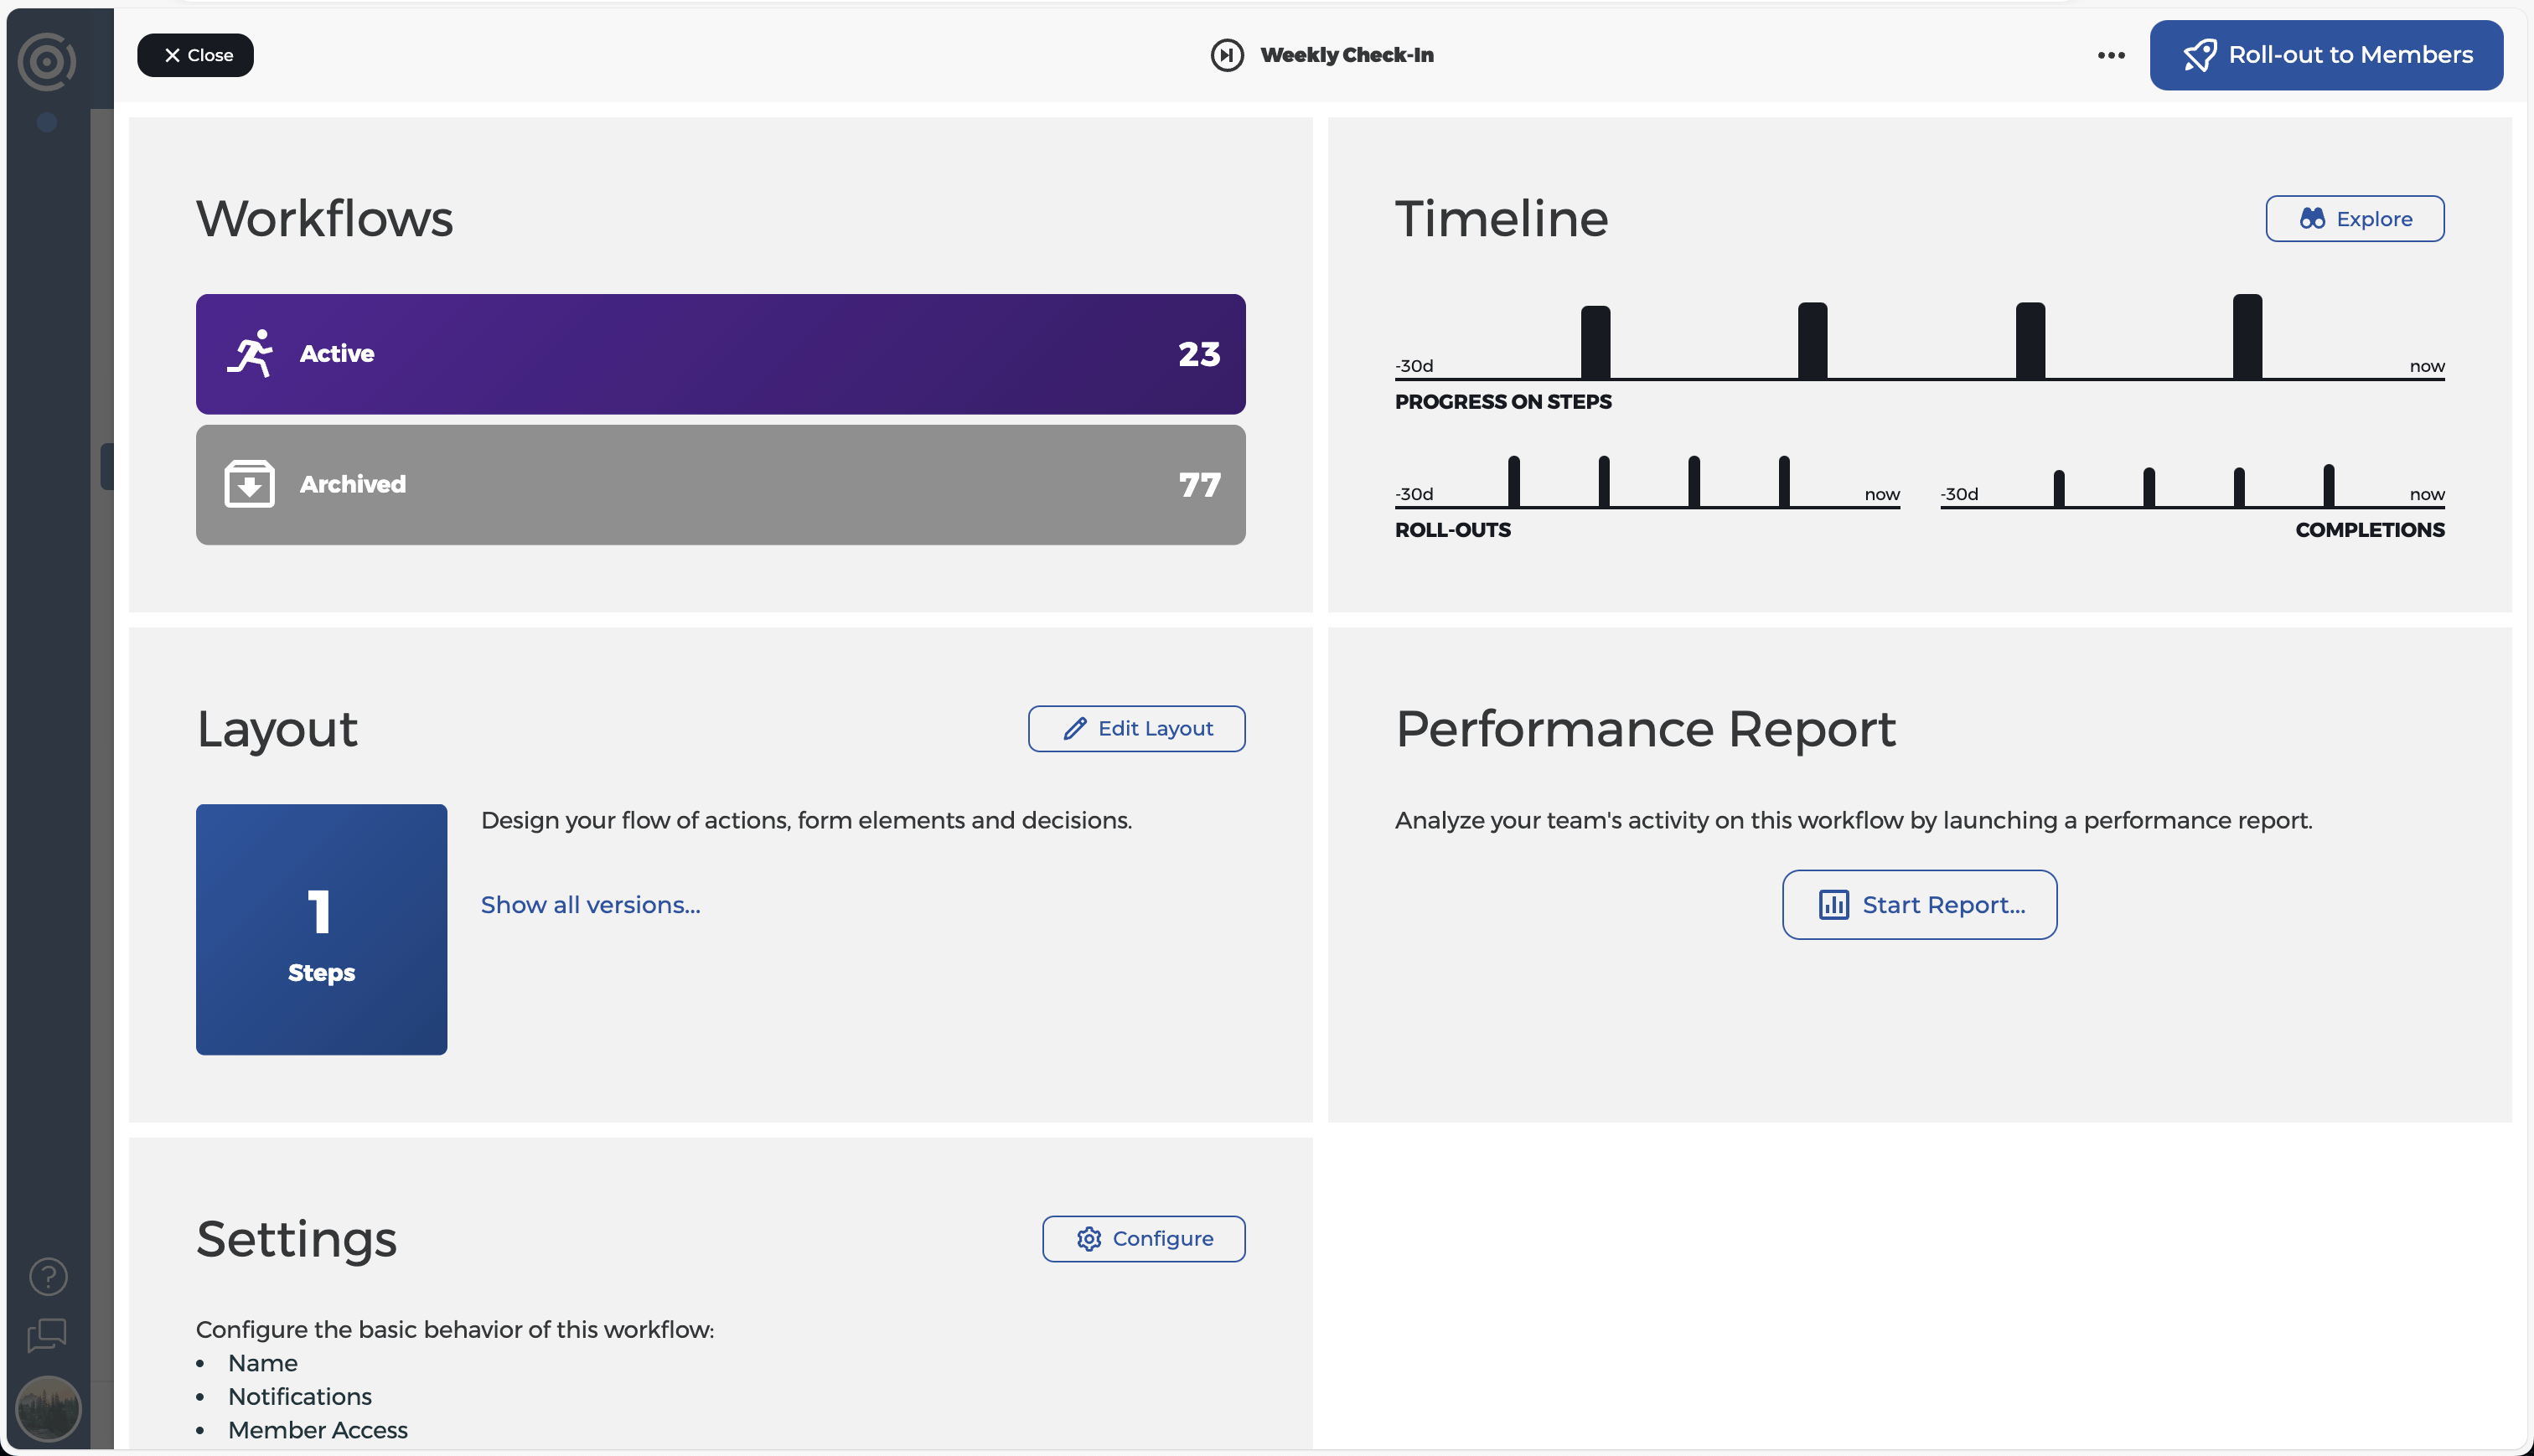
Workflow Dashboard
Within each workflow, there is a dashboard that offers a comprehensive overview of recent usage. This dashboard allows you to review all rolled-out workflow cycles and generate a performance report. You can access the visual workflow designer and organize various workflow versions using the layout button. Furthermore, from the dashboard, you are able to access the general settings of the workflow that are applicable to all cycles and versions.
Workflow Settings
Each workflow has a set of general settings that apply to all versions of a workflow and version settings which are version specific and only apply to the currently selected version. All changes to a workflow's settings are also applied to its rolled-out cycles.
You adjust the workflow settings by clicking on the Configure button from the settings section on the workflow's main dashboard.
- Name
This name of the workflow visible to both clients and staff members.
- Display To Users As
This name is shown to client members instead of the workflow name. Only client members will see this name.
- Detailed Description
Allows you to provide some information about this workflow to staff and client members.
- Deployment Access
Whether or not all or selected clients are able to independently deploy a new cycle of this workflow on demand.
- Administrative Access
Whether or not clients are allowed to start, stop, archive, and delete a workflow cycle on their own.
- Notifications
Enable notifications for staff and client members and other recipients for specific workflow events. You may select a different list of recipients for each event.
Adjusting a Workflow
Quick Setup Tutorial
- Go to your team's Workflow menu
- Click on the name of the workflow
- Open the layout editor
- Save and apply changes by clicking the Save button
Goalify workflows are easy to customize. You can change the design and settings at any time, and the changes will apply to all cycles of the workflow. To avoid any issues, you can create a new version first and adjust the design and settings only for that particular version. When you assign a workflow to a member, you can choose which version to use for that roll-out.
Workflow Versions
If you change the design of a workflow, the changes will apply to all cycles. If you don't want your changes to affect existing cycles, you can create a new version of the workflow. This way, the already rolled out cycles will remain unchanged.
Creating a New Version
When you want to change the layout of a workflow that's already been assigned, you'll see two options: create a new version or edit the current one. You need to choose one of these before making any changes.
New versions are copies of the latest version and all versions are stored with the workflow. This helps keep workflows organized and minimizes the number of workflows for each team.
Naming Workflow Versions
You can provide a different workflow name for each version. You can browse a list of all versions of a specific workflow by clicking on the Show all version... button from within the layout section of the workflow's main dashboard.
Assigning a Workflow
Assign a workflow to one or more members to start guiding them through a structured process. You can launch a workflow immediately or schedule it to begin at a specific date and time.
Quick Setup Tutorial
- Open your team's Workflows menu.
- Select the workflow you want to assign.
- Click Roll out to Members.
- Select the members and configure the roll-out.
- Click Roll out.
To assign a workflow, open the Workflows menu of your team and click the name of the workflow. On the workflow dashboard, click Roll out to Members in the top-right corner.
An assigned workflow is called a cycle
A cycle is a single assignment of a workflow to a member or group of members. Each cycle can only be completed once, but you can assign the same workflow as many times as needed.
Think of a cycle as a fresh copy of a form. Each time you roll out a workflow, a new cycle is created that can be started, paused, archived, or deleted independently.
These are the settings you can configure for each roll-out:
- Assign
-
Select the people who should receive the workflow using the Assign select box.
If you assign the workflow to multiple people, choose how they should work on it:
- Individual cycles: Each person receives their own workflow and completes it independently.
- Shared cycle: All selected people work together in the same workflow cycle. Everyone can view the shared progress and contribute to completing it.
- Start of this roll-out
-
Schedule exactly when members should begin working on the workflow.
You can choose a start date in the past or the future and specify the time zone that should be used. The cycle is created immediately, but it only becomes active at the scheduled start time.
- Label for this roll-out
-
Add a custom label to make this roll-out easy to identify.
The label appears alongside the workflow name and helps both you and your members distinguish between different workflow cycles.
- Workflow Version
-
Choose which version of the workflow should be assigned.
By default, the latest version is selected, but you can roll out any published version when needed.
When everything is configured, click Roll out to assign the workflow.
Depending on your workflow's notification settings, members will automatically receive an email, a push notification, or both, informing them that a new workflow is available.
Review assigned cycles
Quick Setup Tutorial
- Go to your team's Workflow menu
- Click on the workflow name
- Click the Explore button in the timeline card
To review the cycles of a workflow, go to your team's "Workflows menu" and open the workflow by clicking on its name. Then, click on the "Explore" button from the dashboard. You can use the toolbar at the bottom of the screen to show or hide columns in the explorer data grid. The search box at the top right allows you to search for specific cycles, and next to the search button, you'll find an option to select a date range for the displayed cycles.

Access from a member's dashboard
Remember, you can view all the cycles assigned to an individual member from the member's dashboard. To do this, click on the member's name from the members list and select the Browse Workflow Archive option from the Action button.
(Bulk) Delete/archive assigned cycles
Quick Setup Tutorial
- Go to your team's Workflow menu
- Click on the workflow name
- Click the Explore button in the timeline card
- Select the necessary cycles
- Click the archive or delete button
To delete or archive cycles of a workflow, go to your team's "Workflows menu" and open the workflow by clicking on its name. Then, click on the "Explore" button from the dashboard. Each cycle can be selected using the checkbox of the individual row. Continue by selecting one or more cycles and then click either the Archive button to archive or the Delete button to delete the selected cycles.
Providing Clients Access
Clients who need to start a new workflow cycle whenever they want must be given the right access. This access doesn't allow them to view or change the workflow itself. It only lets them start a new workflow cycle when they need to.
Quick Setup Tutorial
- Go to your team's Workflow menu
- Click on the workflow name
- Click the Configure button in the settings card
- Scroll down to Member Access and Rights
- Choose the All Members or Custom Selection option
To provide clients with access, switch to your team's Workflows menu, and open the workflow by clicking on its name. From the dashboard click on the Configure button, and scroll down to Member Access and Rights.
You may choose to provide access for all members of a team – this can also include future members that you add to your team later, or only selected members. When choosing the selected members option you are asked to select members from your current member list.
You can update this setting at any time by either choosing a different access option or by adding/removing members from the selected members list.
Copying a Workflow
Quick Setup Tutorial
- Go to your team's Workflow menu
- Open the workflow by clicking on its name
- Choose the Copy to option from the button
To copy or duplicate a workflow, switch to the Workflow menu. From there click the name of the workflow. Select the Copy to option from the button on the top right.
Copying to another Team
Coaches with access to multiple teams which belong to the same owner account, can copy workflows from one team to another. Coaches with Team administrator permissions can copy workflows from any team to any team they have access to.
Deleting a Workflow
Deleting a Workflow
Deleting a workflow affects all versions and all deployed cycles of the workflow. This action will also delete all connected member data. Be aware that this step CANNOT BE UNDONE and you will not be able to recover the workflow or any of its connected data.
Quick Setup Tutorial
- Go to your team's Workflow menu
- Open the workflow
- Choose the Delete Workflow option using the button
To delete a workflow, switch to the Workflow menu of your team. Open the respective workflow by clicking on its name. Choose the Delete Workflow option using the button on the top right of the screen.
Deleting a workflow will also delete all of its connected data:
- All versions of the workflow are deleted
- All rolled-out cycles of the workflow are deleted
- All connected client-generated data is deleted